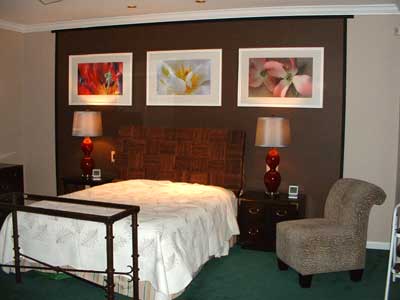
 We nailed the black strips to the wall we framed and hung the flower pictures, we hung the mirror, we hung the sconces, we hung the brackets and put the color balancing vases on them. There is always more to do but it's looking pretty good.
The framing and picture hanging tricks. We got cheap white frames for the flower pictures. Gordon took great care. Four big tricks, that I can remember
Aligning the frame by height. We started with the three over the bed. We completely set up the room. Gordon had a general idea, but I held a picture frame on the wall and moved it up and down by fractions of an inch until Gordon thought it was just right.
Next the mirror and pink ginko. We had to consider the height of the ones over the bed, the doorway to the bath room and the ginko picture. Then there was the general, "How high should a mirror be even if there was nothing else in the room" question. We started with the height of the bed pictures. Not good. As your eye went left it went up to the mirror top, down to the top of the doorway molding and down again to the ginko.
Gordon decided we've hang the mirror and the ginko the at the same height as the doorway molding. They are about as high as the bed pictures but not exactly.
Next the brackets with the vases. They are 37" tall all together and the bracket appears massive in scale. I moved the up and down until they were just right. They didn't align with anything. We had to make a decision though. If we ever get curtain panels, (I had the phrase, "window treatments") we'll have to move them further from the window. Curtains would be nice but they are a low priority for us.Finally the candle sconces. With everything else hung Gordon eyeballed the sconces to the right height. A prime consideration was the convenience or lighting and snuffing the candle. We had to be able to reach it.
When you are unpacking the frames (that is, removing the shrink wrap) remove it from the back and away from the matting. A tiny scratch or bend can ruin the picture or the frame.Don't touch or clean the back side of the glass. We did blow off some dust we raised as we framed them. If the frame is worth anything at all, the backside of the glass is cleaner than ordinary humans can make it. Leave it along or you'll streak it or get fingerprints on it.
Two nails for every picture unless you are hanging something very temporarily.What if Terry mis-drills the holes and they aren't level? Mistakes were made. We needed bolts for the brackets and sconces. My drill drifted. The first time we have to drill two more holes which meant we had to change the height. The second time the two holes were just slightly out of level. Gordon sent me to the kitchen for some of the loaf of bread twist ties. Who knew they were picture levelers? He wrapped the bolt with the twisty. The sconce wen level.
Clean the wall with Softscrub, a paper towel, and a nail . You can't completely hide old nail holes, scratches and dirt marks. But Gordon comes close. For a nail hole Gordon tore a bit of paper towel, stuffed it into the hole with the nail, and finished the hole with some Softscrub. From a few feet away, you can't see it.
Measure each hook. If you aren't using a wire, measure both hooks on the frame. Don't expect them to be the same height. Expect them to be different. A 1/8" will put it out of level.
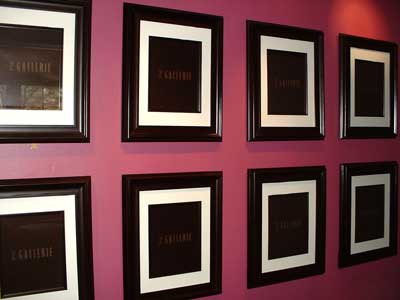
Number pictures in groups so you can put them back in the same place. Scratch the number on the back of the frame. Remember these?
Not only do the hooks' heights vary on a single picture, they vary from picture to picture. We have to put the pictures back exactly in the same place or they'll never be level again. We must number them.
The black strips on the bedroom wall were a mystery to us. Gordon insisted we have some sort of stripe between the taupe and the brown. Suggestion 1 was to paint a stripe. That sounds too much like more painting with masking tape. Suggestion 2 was to paint 1 1/2" trellage and hold it on the wall to see what it looked like. I took suggestion 2. They looked good.
Today I nailed them on the wall. The horizontal strip was 16 feet long. we only needed 12 but I wanted to measure it in place before I cut it to size. To get it in the door I made it 12 feel.
"Try it up there before you cut it, Gordon said, "It might look good if it overhangs the vertical strips." We'll it looked great that way and made the room a bit Oriental and tied in with our chest of drawers. Remarkable. The strips and the white frames look great.
Imagine a bench at the end of the bed and a new dust ruffle.
I can't get a good picture of the propped up headboard.
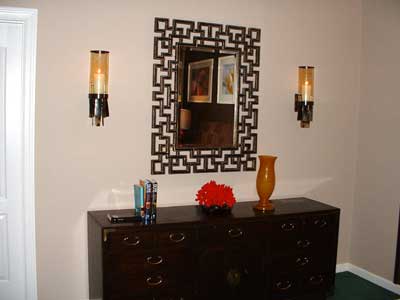
Here are the and sconces and mirror. What goes on the chest is undecided. The coral goes everywhere and picks up the red in the flower pictures.
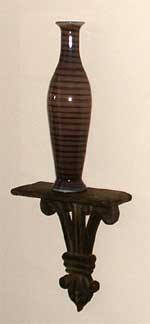
Here is the bracket and vase. There is one on either side of the big window. I can't get both in a picture. They are big and match the headboard and brown wall perfectly. We've balanced colors and scale. I should say that Gordon balanced colors and scale.
They don't show the junk room on Trading Spaces. The very best thing when decorating a room is to remove everything as they do in Trading Spaces. Then you introduce one thing at a time. They don't show you this:

or this:

My poor office.
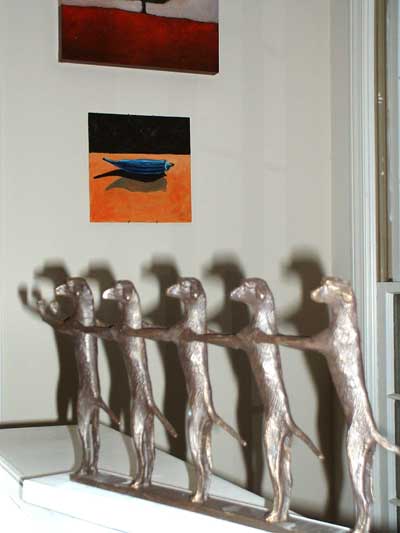
Dancing dogs go everywhere. Enough said: